React源码学习入门(十二)DOM组件更新流程与Diff算法
源码分析
  receiveComponent: function(nextElement, transaction, context) {
    var prevElement = this._currentElement;
    this._currentElement = nextElement;
    this.updateComponent(transaction, prevElement, nextElement, context);
}, updateComponent: function(transaction, prevElement, nextElement, context) {
var lastProps = prevElement.props;
var nextProps = this._currentElement.props;
this._updateDOMProperties(lastProps, nextProps, transaction);
this._updateDOMChildren(lastProps, nextProps, transaction, context);
}, _updateDOMProperties: function(lastProps, nextProps, transaction) {
var propKey;
var styleName;
var styleUpdates;
// 1. 处理旧的Props
for (propKey in lastProps) {
if (
nextProps.hasOwnProperty(propKey) ||
!lastProps.hasOwnProperty(propKey) ||
lastProps[propKey] == null
) {
continue;
}
// 注意判断条件,只有nextProps没有的才会走到这里,意味着这里需要做删除操作
// 1.1 处理旧的style属性,清空styleUpdates对应的属性
if (propKey === STYLE) {
var lastStyle = this._previousStyleCopy;
for (styleName in lastStyle) {
if (lastStyle.hasOwnProperty(styleName)) {
styleUpdates = styleUpdates || {};
styleUpdates[styleName] = '';
}
}
this._previousStyleCopy = null;
}
// 1.2 处理旧的事件属性,先删除旧的监听器
else if (registrationNameModules.hasOwnProperty(propKey)) {
if (lastProps[propKey]) {
deleteListener(this, propKey);
}
}
// 1.3 处理旧的属性,删除旧的属性
else if (
DOMProperty.properties[propKey] ||
DOMProperty.isCustomAttribute(propKey)
) {
DOMPropertyOperations.deleteValueForProperty(getNode(this), propKey);
}
}
// 2. 处理新的属性
for (propKey in nextProps) {
var nextProp = nextProps[propKey];
var lastProp = propKey === STYLE
? this._previousStyleCopy
: lastProps != null ? lastProps[propKey] : undefined;
if (
!nextProps.hasOwnProperty(propKey) ||
nextProp === lastProp ||
(nextProp == null && lastProp == null)
) {
continue;
}
// 2.1 处理新的样式属性
if (propKey === STYLE) {
if (nextProp) {
nextProp = this._previousStyleCopy = Object.assign({}, nextProp);
} else {
this._previousStyleCopy = null;
}
if (lastProp) {
// 和前面的处理一样,对于之前的style标签,如果next里面没有的,需要清空
for (styleName in lastProp) {
if (
lastProp.hasOwnProperty(styleName) &&
(!nextProp || !nextProp.hasOwnProperty(styleName))
) {
styleUpdates = styleUpdates || {};
styleUpdates[styleName] = '';
}
}
// 更新新的样式属性
for (styleName in nextProp) {
if (
nextProp.hasOwnProperty(styleName) &&
lastProp[styleName] !== nextProp[styleName]
) {
styleUpdates = styleUpdates || {};
styleUpdates[styleName] = nextProp[styleName];
}
}
} else {
// 全新的样式属性
styleUpdates = nextProp;
}
}
// 2.2 处理新的事件
else if (registrationNameModules.hasOwnProperty(propKey)) {
if (nextProp) {
enqueuePutListener(this, propKey, nextProp, transaction);
} else if (lastProp) {
deleteListener(this, propKey);
}
}
// 2.3 处理新的属性
else if (
DOMProperty.properties[propKey] ||
DOMProperty.isCustomAttribute(propKey)
) {
var node = getNode(this);
if (nextProp != null) {
DOMPropertyOperations.setValueForProperty(node, propKey, nextProp);
} else {
DOMPropertyOperations.deleteValueForProperty(node, propKey);
}
}
}
if (styleUpdates) {
CSSPropertyOperations.setValueForStyles(
getNode(this),
styleUpdates,
this,
);
}
},
小结一下
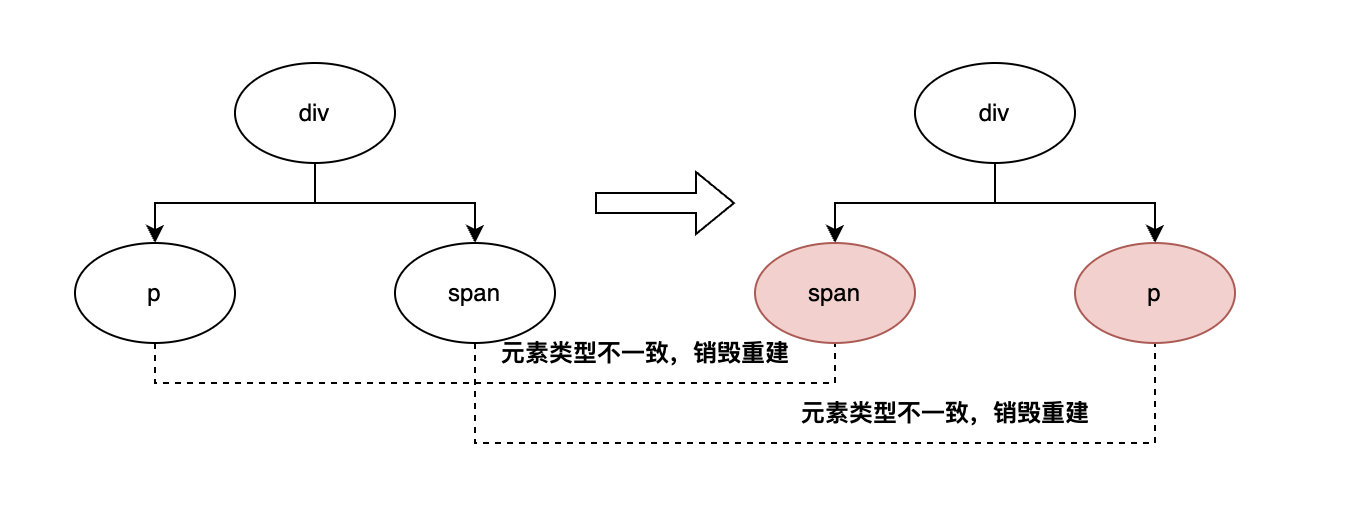
第一种情况,DOM元素不同
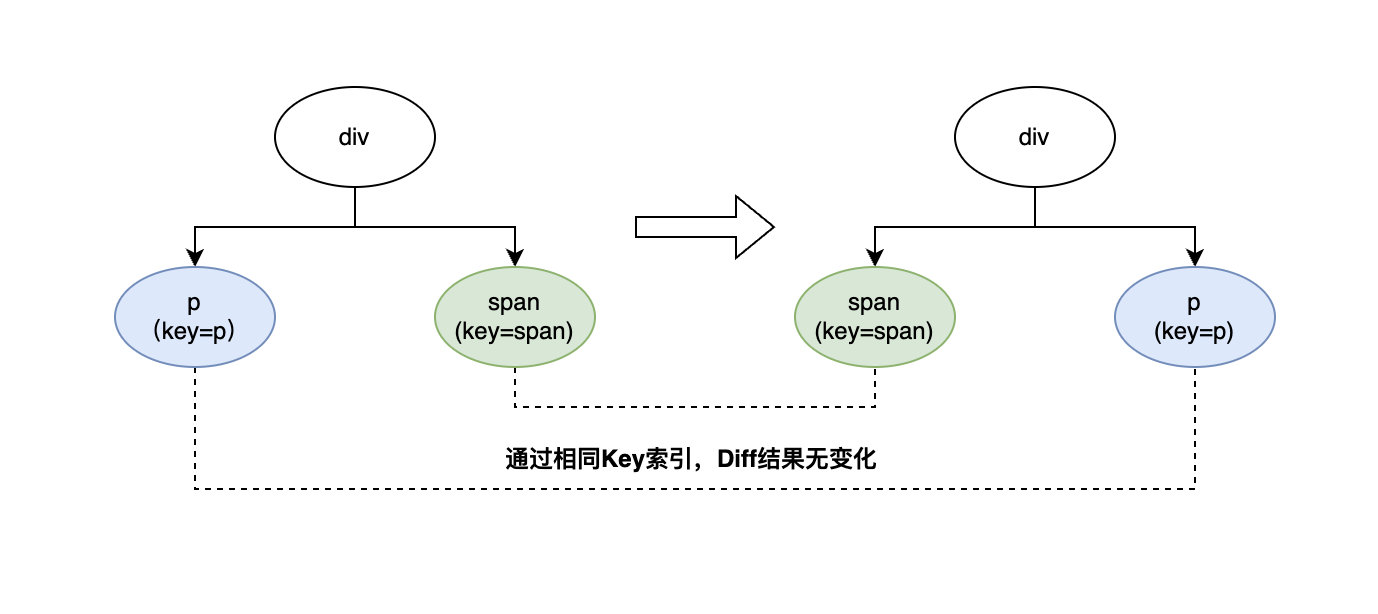
第二种情况,DOM元素不同,但相同元素设置了Key
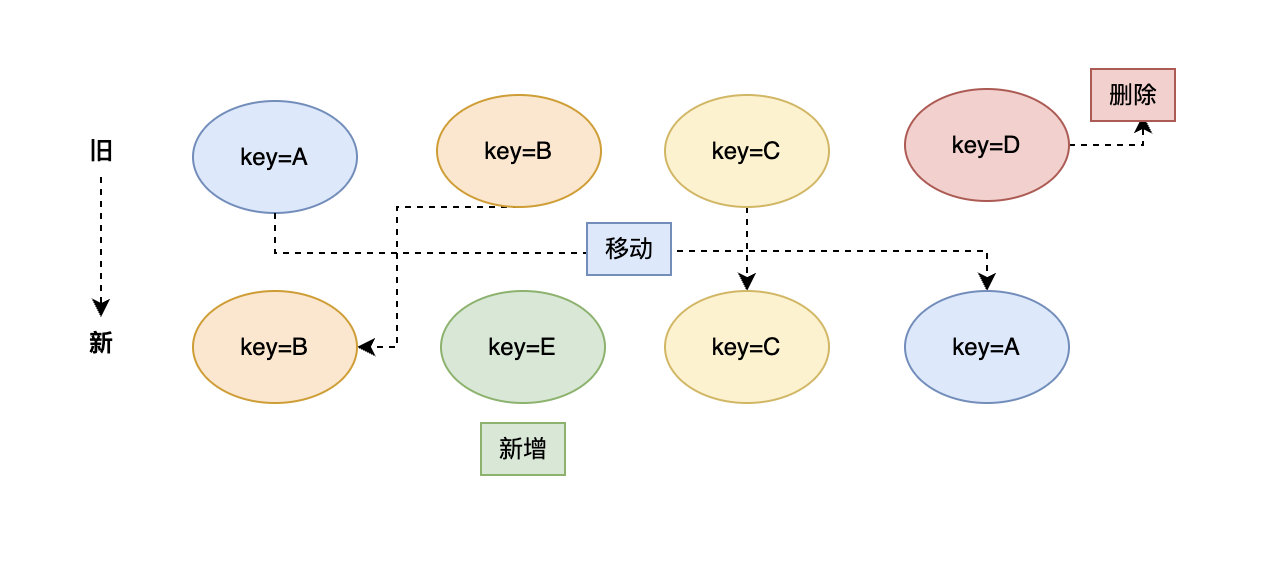
同key的移动、删除、新增算法
Last updated